CUTTING FABRIC FROM THE FIRST CUT
A few people have asked how I cut my fabric and when I tell them I use my ruler measurements and lines and pay little attention to the markings on the cutting mat they get confused. I teach this method in my classes and decided I'd share it here as well.
When quilters are ready to use a piece of fabric to start
making a quilt we start with a straight line of fabric. If we don't none of our cuts will be straight and our quilts will not come together as they should. To get this first straight cut there are a
couple of ways to make that edge straight.
Here is how I do it.
1 1)
Take the fabric so the selvedge edges meet at
one end and there is a fold at the other.
Fabric comes that way when cut from the bolt, but you may be using a
piece that no longer has that fold. Make
the fabric as flat as possible with no wrinkles. Press it if needed.
+Lining+up+fabric.jpg)
2) Lay
your fabric with the fold even with the bottom line on your cutting mat as
indicated in this photo. Line it up with a measurement on the cutting mat. In this photo it is at the 4" mark.
Notice how
uneven the cut edge is here in the photo.
+Lining+up+ruler+on+mat.jpg)
3) Place
your ruler (template) so that you have a line on the ruler, or the edge of it,
even with the line where you have your fabric
+Lining+up+other+edge+with+line+on+the+mat.jpg)
4)Make
sure your ruler lines up with the same line (mark) on the selvedge edge as it
does on the folded edge. (Notice again here it is at the 4" mark). Don’t worry where the fabric shows under the ruler as that is the uneven end.
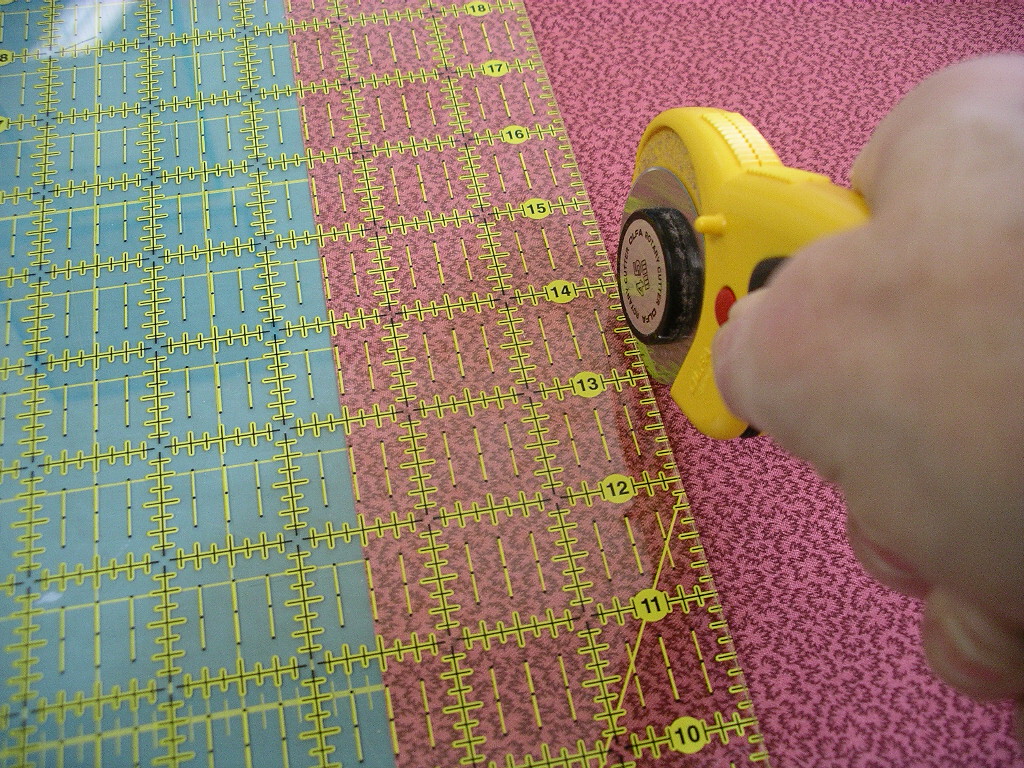
5) Using your rotary
cutter placed against the ruler, and holding the ruler down firmly slowly make
your cut along the ruler. Carefully hold the ruler as you cut so it does not
slip off the place you need your cut.
6) Once you have this first cut your fabric is ready to use with that straight line
to start cutting your quilt pieces and you can use the ruler markings instead of
the markings and measurements on the cutting mat for the rest of the cut. For me it makes cutting my pieces easier. (Some quilters will
continue to use the measurements and markings on the cutting mat and that is fine. Like quilters will tell you - there are no quilt police!) I do still use the cutting mat measurements from time to time to re align my fabric or to cut a piece that is wider than any of my rulers.
+Ruler+lines+vs+cutting+mat.jpg)
7)
SO to cut using the measurements and markings on
the ruler instead of the cutting mat…..
Notice my fabric is so NOT lined up with the
measurement markings on the cutting mat. This is what makes this so much fun! I don’t have to worry about how my fabric
lays on the cutting mat. (I know some
quilters are gasping at the moment…)
Place your ruler so the measurements
on your RULER line up with the straight edges of the fabric at the fold as well
as the edge you just cut. Line the ruler up along the entire edge of left edge
of the fabric.

8) Once you have it all lined up and even, use
your rotary cutter along the right edge of the ruler and while holding the
ruler firmly down, but your fabric.

9) To make your cuts
smaller or using a square template you can also just line the ruler up with the
fabric instead of lining your fabric up along the measurements on the cutting
mat. This comes in handy when you can’t
see all the measurements on the cutting mat.
EXTRA TIP: Once you start using one ruler/template continue to use the same one, or one by the same company throughout the entire cutting process of that project. Each company uses different line markings which may be wider than another company. If your cuts are just a tiny bit off on each and every cut eventually your pieces are not going to be the same size and will not fit the way they need to.
I hope this has helped some who were confused about being able to cut without using the markings on a cutting mat. If you still have questions, contact me and I’ll do my best to help.
I hope this has helped some who were confused about being able to cut without using the markings on a cutting mat. If you still have questions, contact me and I’ll do my best to help.
